Creating periodized plans and creating period-specific schedules and statistics is easy. It can be done in 3 steps.
Step 1 - Creating annual periods
Method A
Open Settings-Periodization (you'll need an admin account) and click Add New. Then select a sport (or All sports if you work with only one sport), a team (or all teams) and an athlete (or all athletes), enter the name of the period, the start and end dates, select a color (you can also paste a color code) and save. Repeat the operation for all periods you wish to use.

Note: click the colored square to pick a color or paste a color code.
Method B
You can also add new periods quickly from the calendar, by selecting the Period-Add New option. Each period can be defined as Macrocycle, Mesocycle, Microcycle and Competition.
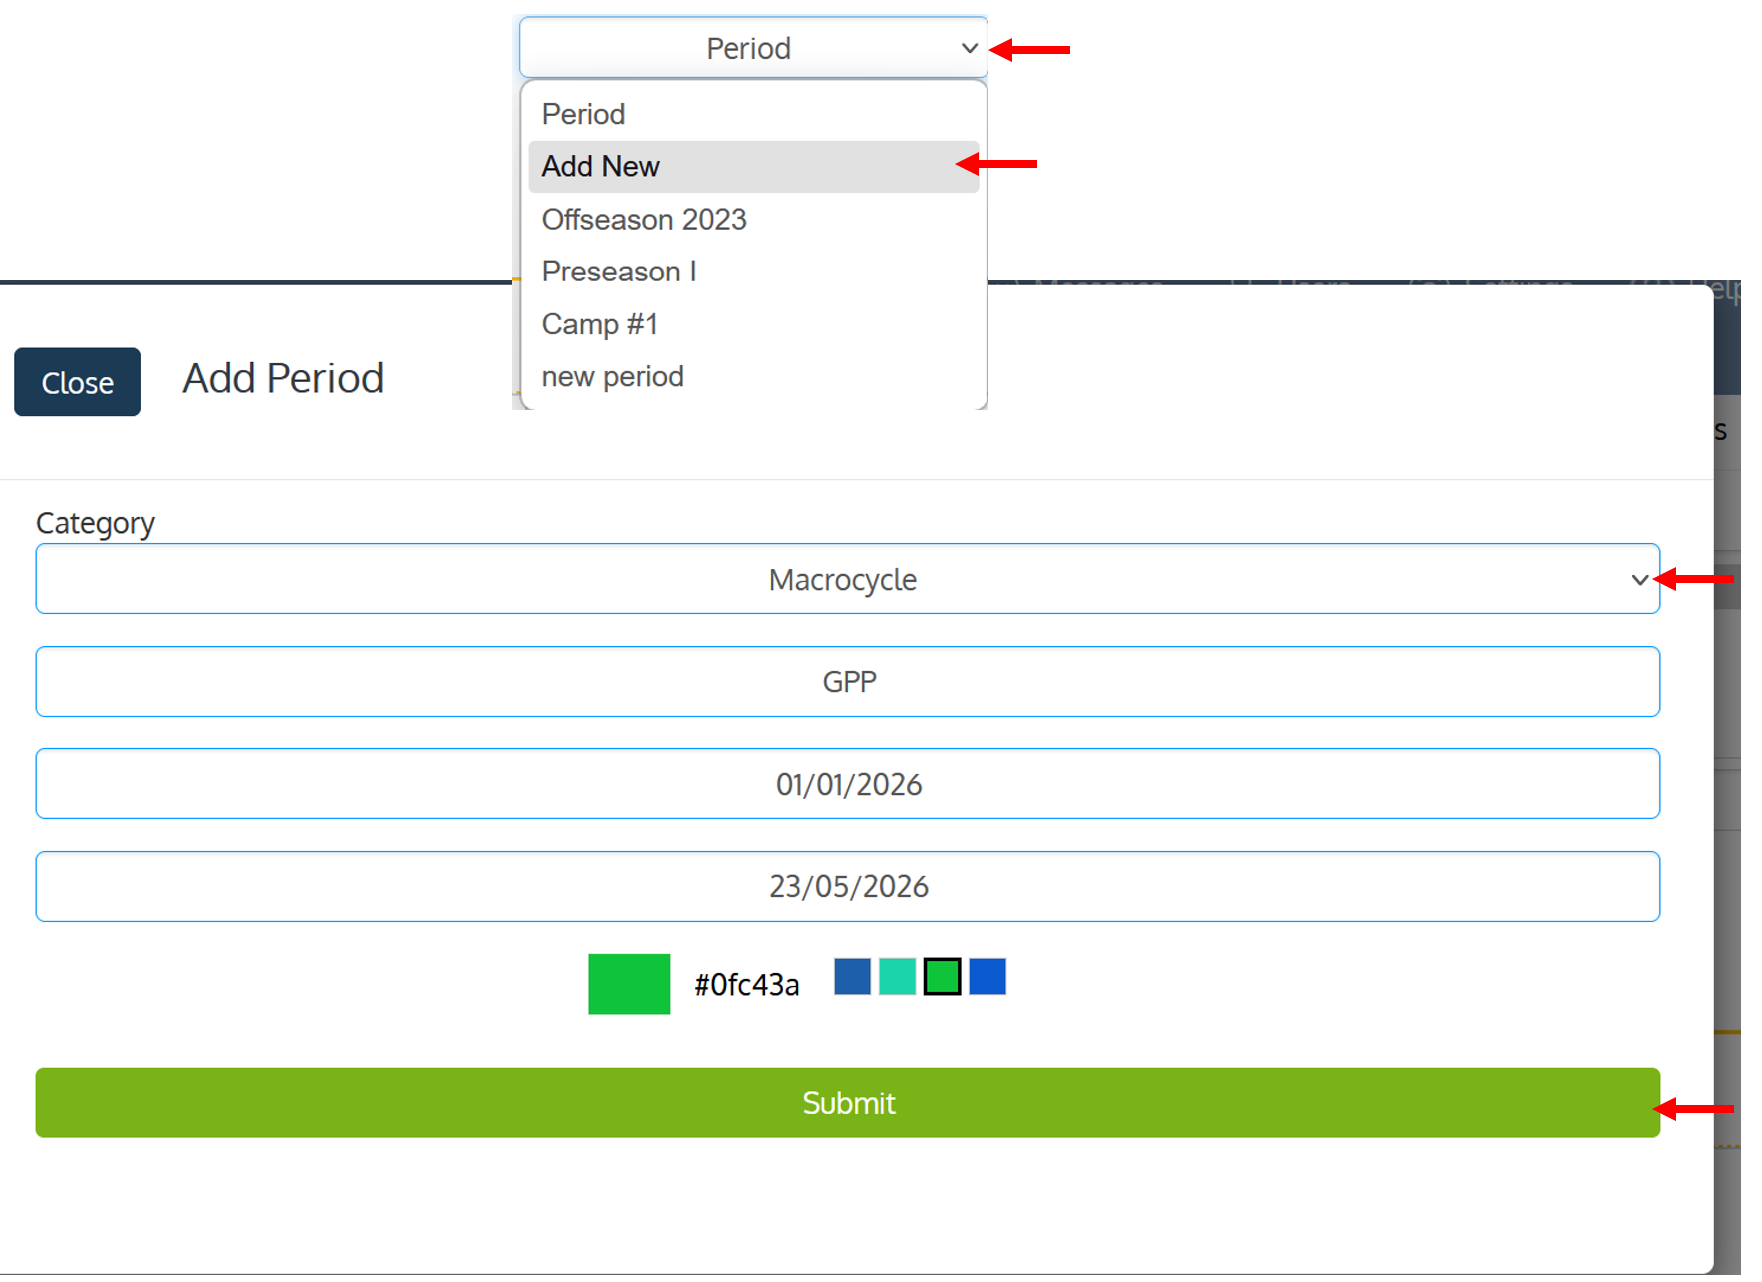
Step 2 - Visualizing cycles and periods on the calendar
Once periods have been created, open the team calendar and select your team and athletes. If periods are defined, a band of the selected color will be automatically displayed below the dates. When periods are overlapping, each one will be represented by a band of its specific color.
To automatically load the calendar and corresponding sessions for a specific period, select the appropriate option in the Period dropdown.

Step 3 - Exporting period-specific statistics
To export period-specific training statistics, select Log & Stats - Periodization, select a team, athlete(s) and date range and click Export. The resulting document will displayed athlete and team data (in bold) grouped by period.

Was this article helpful?
That’s Great!
Thank you for your feedback
Sorry! We couldn't be helpful
Thank you for your feedback
Feedback sent
We appreciate your effort and will try to fix the article